Social networks are kind of like the king of the hill these days, so it should be no surprise that many companies around the world use Facebook, Instagram, and many other services as additional or even main channels in their products and services marketing
Instagram/Facebook effects (also called face filters, or masks) are usually used to entertain people, but they can also be a marketing tool. They can be especially valuable for new product launches or major product updates and releases. Masks will likely appear in your must-have list if the success of your product or project strongly depends on your customers’ social activity.
Of course, there is always the question of available resources and fresh ideas. If you have both of these, then the use of masks would be a good way to demonstrate to customers the degree of involvement and interest of the team in the success of the project.
There are many guides and videos on mask creation (or ‘effects’ in Facebook’s terminology), but not all of them cover the entire process from effects creation and testing to distribution. This is why we wrote this guide, which can be useful for managers, designers, and developers. Essentially, it presents a bird’s eye view of mask creation without the extra details.
Spark AR Studio
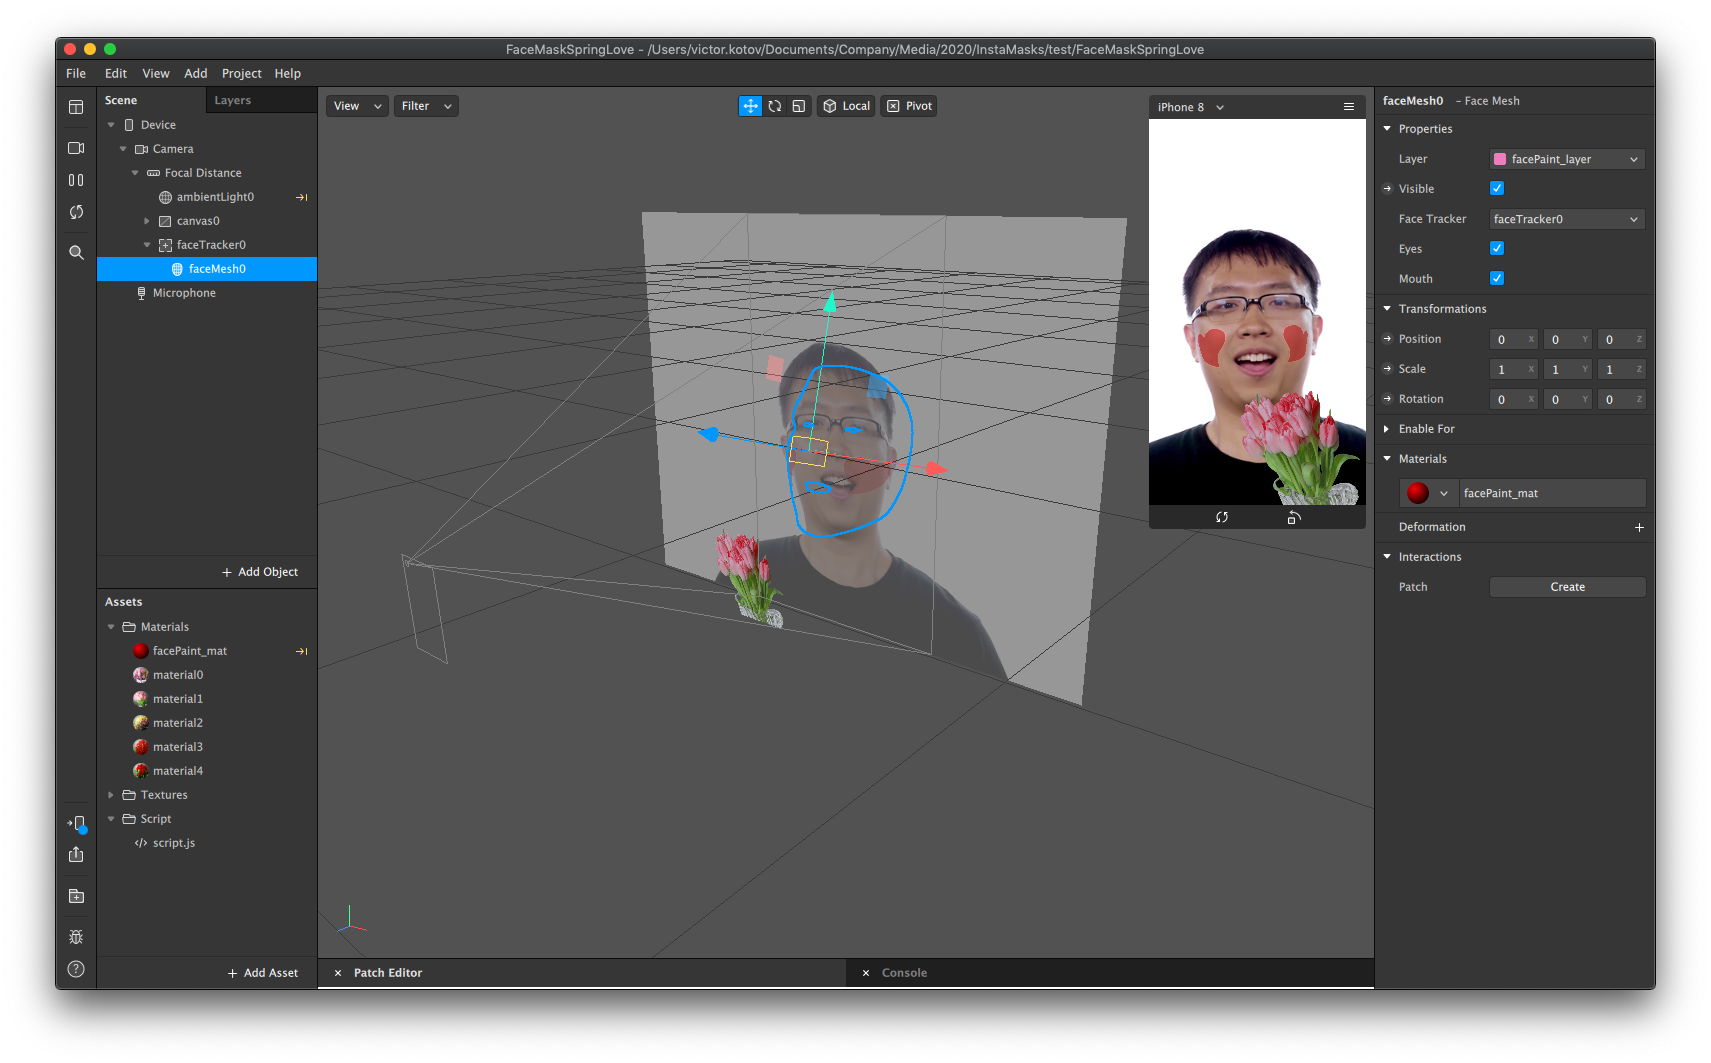
Facebook provides a special integrated development environment (IDE) in the form of Spark AR Studio for effects (masks) creation.
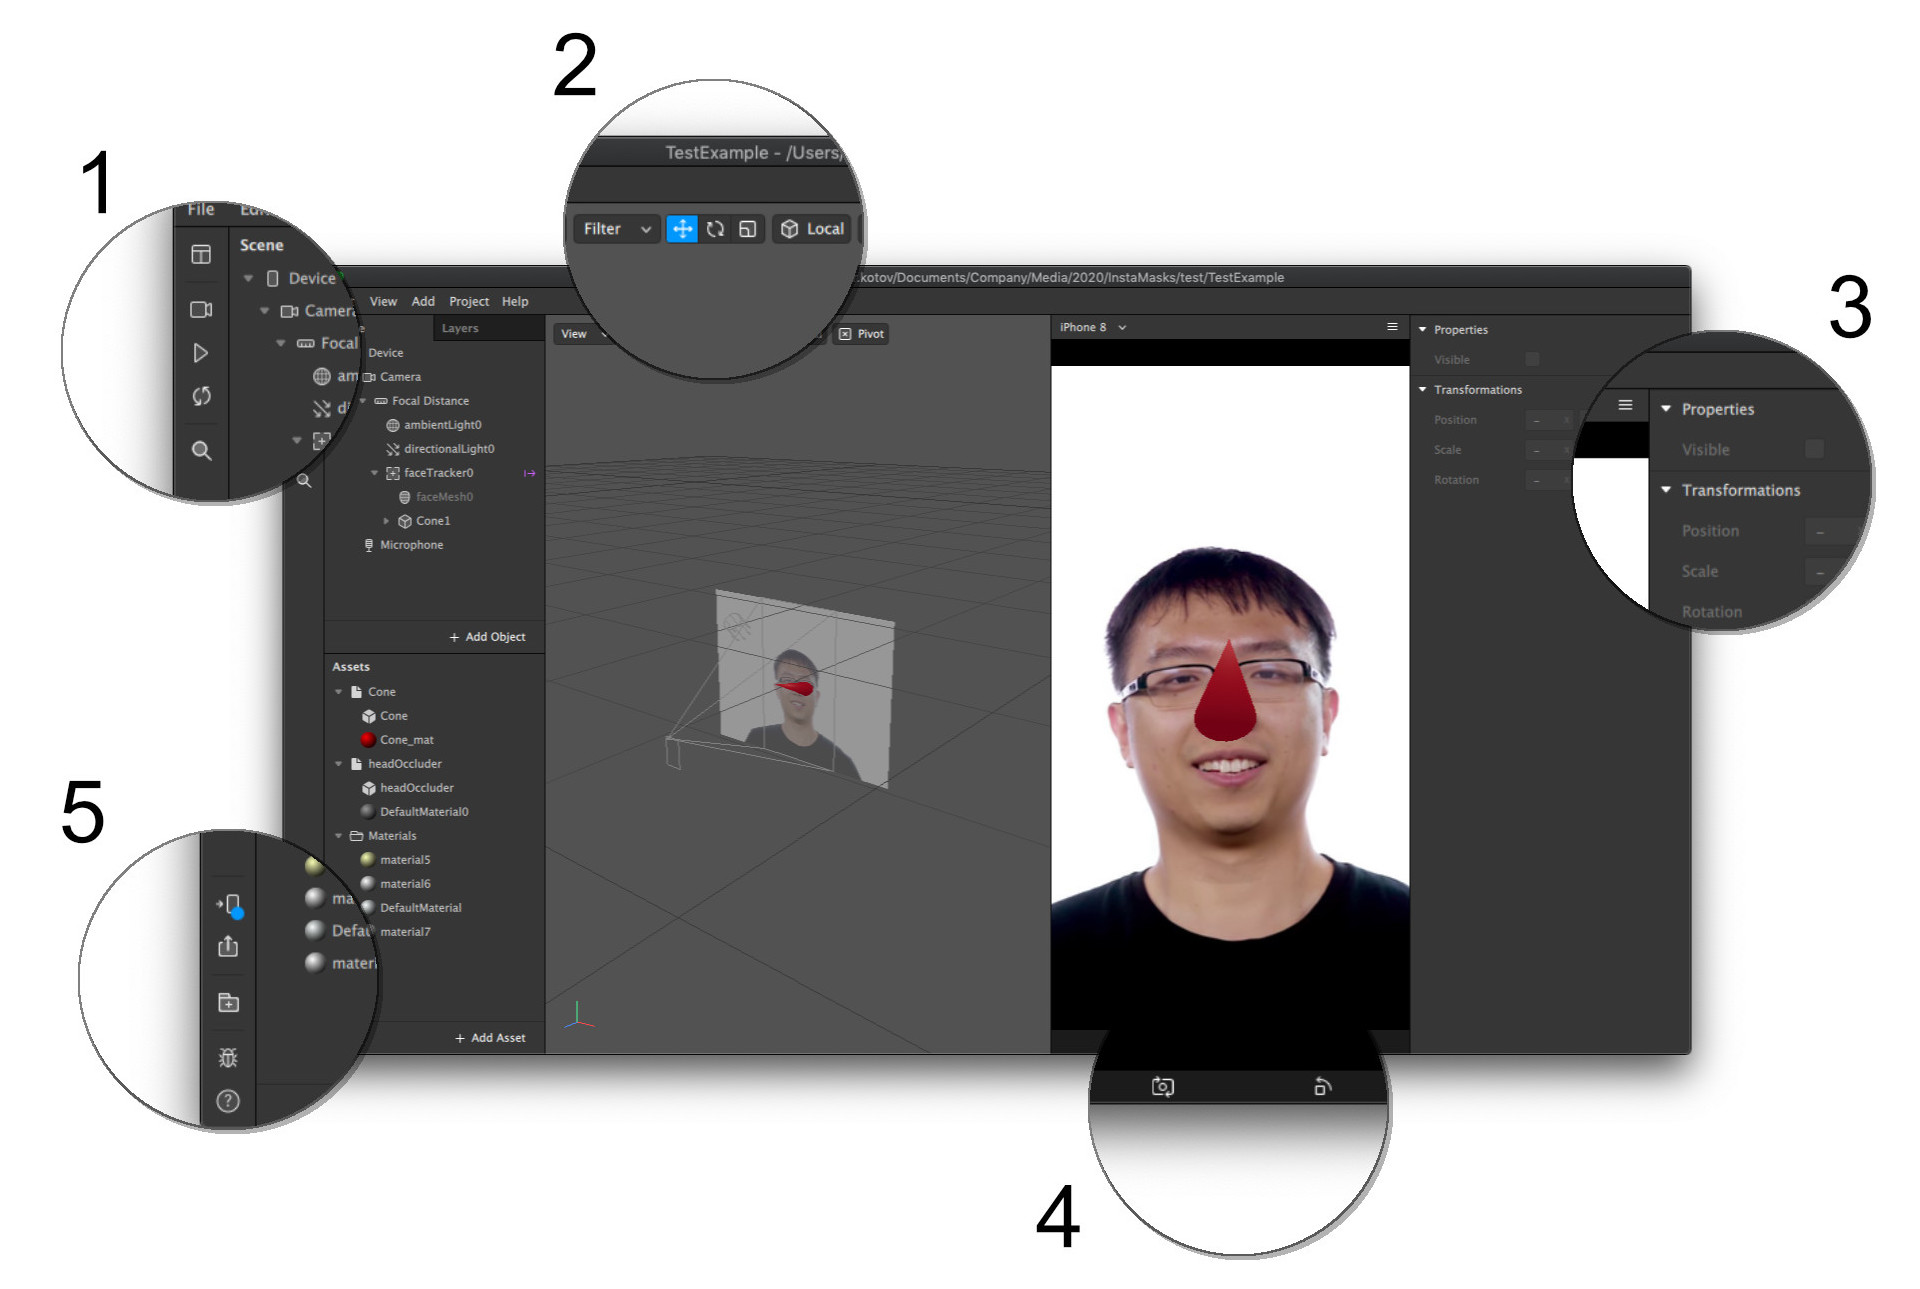
1. Preview toolbar
![]() Video – Select a person/face to preview the effect. You could use a webcam as a source but remember that the Studio doesn’t support a hot plug. Thus, you have to relaunch the Studio if you connect a webcam after the program has already started.
Video – Select a person/face to preview the effect. You could use a webcam as a source but remember that the Studio doesn’t support a hot plug. Thus, you have to relaunch the Studio if you connect a webcam after the program has already started.
![]() Play/Pause—this is a very important button. You can manage the object’s position in pause mode for more precise placement.
Play/Pause—this is a very important button. You can manage the object’s position in pause mode for more precise placement.
![]() Restart—this is also a useful button if your effect contains an interactive element and its state depends on user actions/gestures.
Restart—this is also a useful button if your effect contains an interactive element and its state depends on user actions/gestures.
2. Setting up object position and size
![]() Adjust the position of the selected object or object group along the X/Y/Z axes.
Adjust the position of the selected object or object group along the X/Y/Z axes.
![]() Rotate the selected object or object group around the X/Y/Z axes.
Rotate the selected object or object group around the X/Y/Z axes.
![]() Edit the scale of the selected object or object group along the X/Y/Z axes.
Edit the scale of the selected object or object group along the X/Y/Z axes.
3. Object properties and transformations (Inspector)
Content of the Properties section depends on what object you have selected.
4. Additional controls for the preview
![]() Switch to Front/Back camera.
Switch to Front/Back camera.
![]() Rotate to Horizontal/Vertical.
Rotate to Horizontal/Vertical.
5. Testing and distribution
![]() Test on device (you will need to install a special Spark AR Player app).
Test on device (you will need to install a special Spark AR Player app).
![]() Prepare and upload an effect to the Spark AR Hub.
Prepare and upload an effect to the Spark AR Hub.
Our advice for beginners would be to start with one of the Studio’s templates:
- Eye Color—Make eye colour tweaks.
- 3D Animated Poster—Create a target AR world effect. When the back camera is pointed at a real-life target, an effect will play.
- Face Decoration—Place 3D objects (e.g., glasses) on the face.
- Background—Replace the texture applied to the background material to customise the effect.
- Makeup—Use the options in the Inspector to edit the make-up effect on the face in the scene.
- World Object—Place an object in the world to create a world effect that is visible through the back camera on a mobile device with a gyroscope.
- Neck Decoration—Place objects on the neck, like jewellery or a bow tie. Just add the objects to your project and drag them into the Scene panel.
- Color Filter—Adjust options in this template to create colour filters. All you need to do is select the object named ColorFilter in the Scene panel, and edit the values in the Inspector.
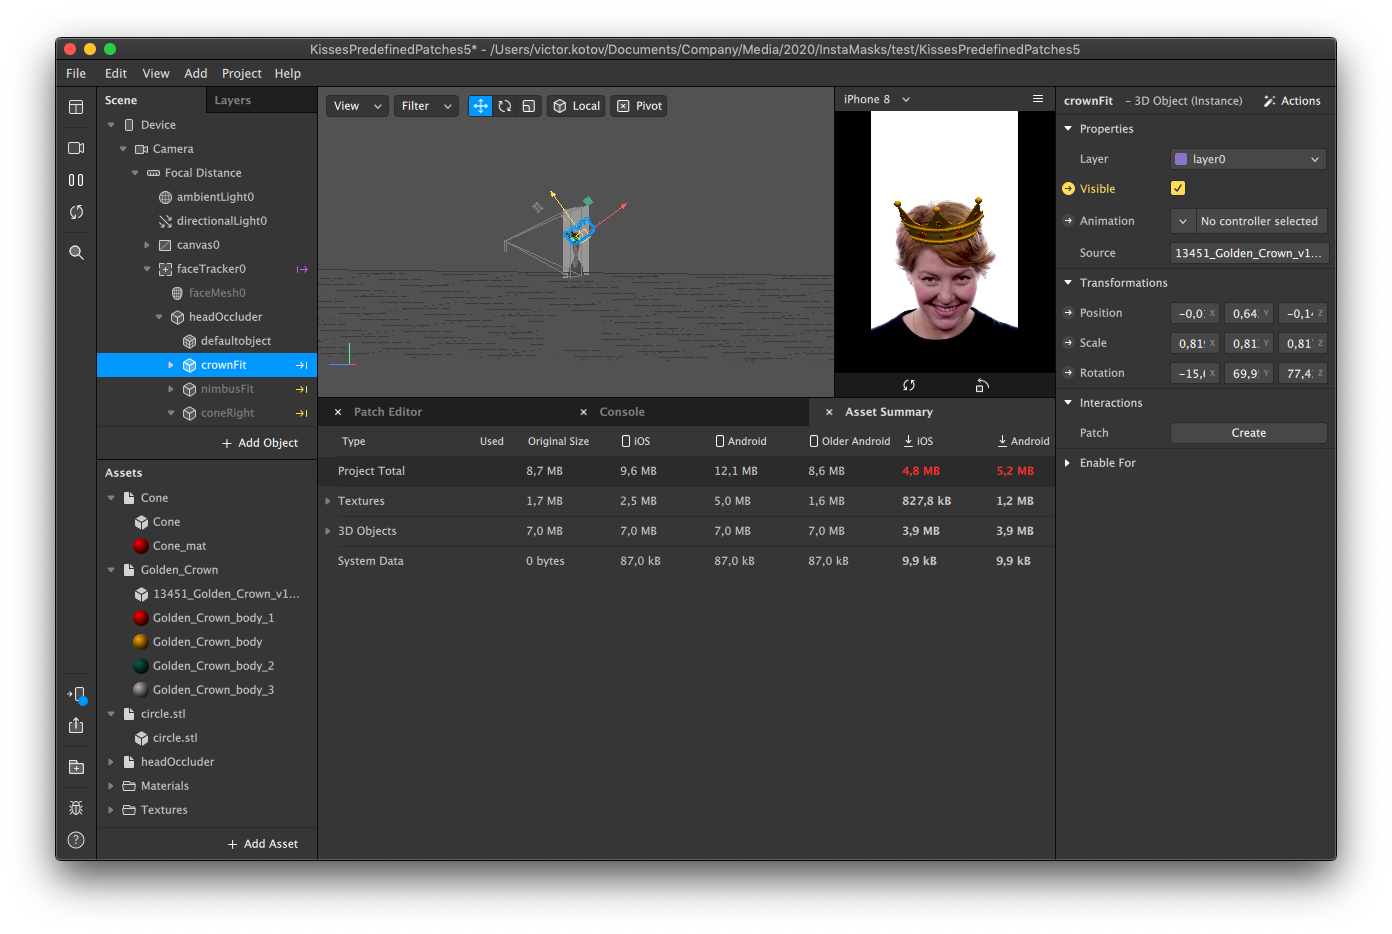
- Head Decoration—Place objects on the head, like hats or crowns. Just add the objects to your project and drag them into the Scene panel.
- Face Mask—This is a face effect that uses a physically-based material to create a mask with metallic details, surface texture, and realistic lighting. Replace the texture in the Assets panel to make it your own.
Templates demonstrate different effect types (one template = one type), but it’s possible to combine different types in one project. For example, you could use background segmentation/replacement along with head decoration with multiple 3D objects. You can choose from a range of templates in the Spark AR Studio or create your own effect from scratch.
Let’s review the common structure of an effect’s scene through the face mask template:
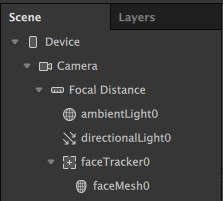
Device ->
   Camera ->
      Focal Distance* ->
         faceTracker0 -> // Лицо персоны #0
            faceMesh0 // Mask
* Focal distance, Camera, and Device have only one instance.
All objects that can be anchored to a person(s) should be placed under faceTracker. It is possible to track up to five persons (set in project settings).
AR objects can be anchored to a predefined list of face landmarks including the following:
- Left/Right Cheek.
- Chin.
- Left/Right Eyeball.
- Left/Right Eyelid.
- Left/Right Eyebrow.
- Forehead.
- Nose.
Some of these landmarks have additional sub-landmarks (e.g., nostril for nose).
It is also possible to use the following face ‘gestures’ to trigger some effect event or scene update/modification:
- Blink.
- Eyebrows Raised.
- Eyebrows Lowered.
- Happy Face.
- Head Nod.
- Head Rotation.
- Head Shake.
- Kissing Face—This one is kind of special, and you have to practice a bit to make it more artistic.
- Left/Right Eye Closed.
- Mouth Open—It is possible to set mouth openness as a number.
- Smile.
- Surprised Face.
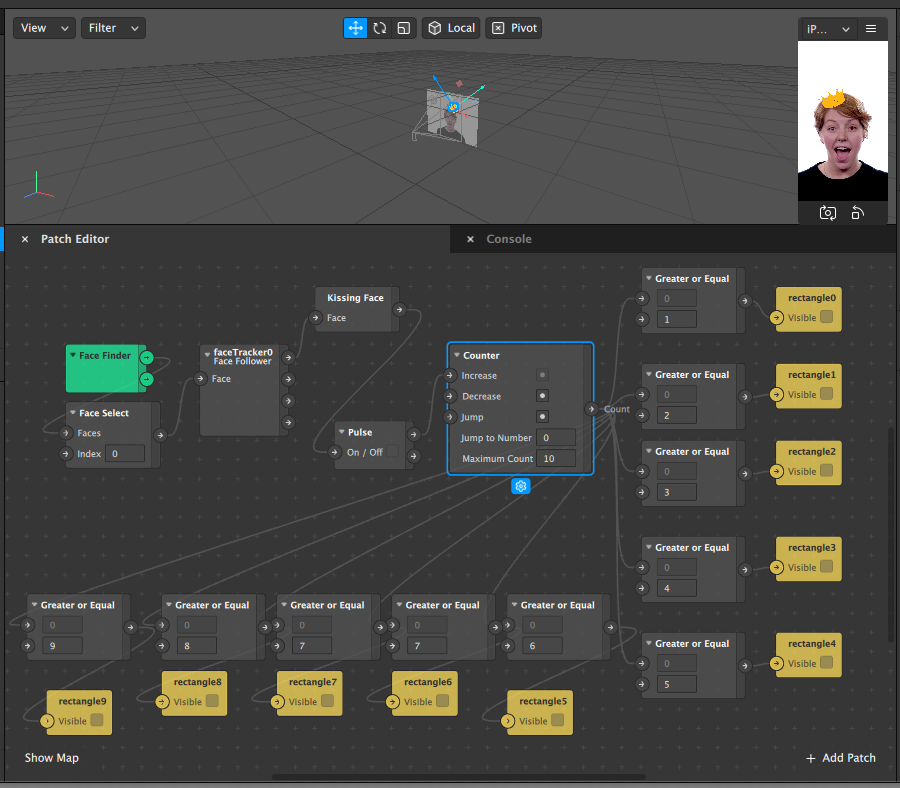
Effect templates mostly use patches to add interaction and animation. Spark AR Studio has a special area for patches management that can be hidden:
You can also implement the same features via code/script. It should be no surprise that the programming language is JavaScript. Studio doesn’t have a built-in editor for scripts, so you have to use a third-party application (e.g., VS Code, WebStorm etc.). Spark AR API has many modules, such as localisation support and native controls (picker и slider).
A few notes on specific effects programming:
- Objects should be created in Studio to be ‘visible’ from a code.
- Reactive.
- Simple programming errors can be handled during development via Spark AR Studio’s console.
Supported formats for 2D assets:
- PNG
- JPEG
- SVG
Supported formats for 3D assets:
- FBX 2014/2015 (binary and ASCII versions)
- gITF 2 (binary and text versions)
- COLLADA / DAE
- OBJ
- DAE
Testing and distribution
Effects testing can be organised in the Studio—it has seven models (recorded video of moving male/female head and making ‘faces’), and you can also use your own camera to test an effect by yourself.
Facebook provides a mobile application (Spark AR Player on Android and iOS) that can be used for effect testing on real devices.
All effects go through the Facebook review team before they are made available for everyone. There is a special Spark AR Hub where you can upload and manage all your effects. You can upload an effect right from the Spark AR Studio or export your effect OR project and submit it to Spark AR Hub.
Each effect should have its own profile (i.e., some meta-data, an icon, and a video of the effect in action), so be ready to provide all required information when you are going to publish it.
The review process consists of two steps. First, there is an automatic review tool that sometimes produces funny or unusual feedback and rejection notes:

Apparently, the AI decided it was an explosion and not a bouquet in the image above and dismissed the effect for formal reasons.
In such cases, you will have to resubmit the effect with some comments; at this stage, the effect would be sent to a review team member and not a bot.
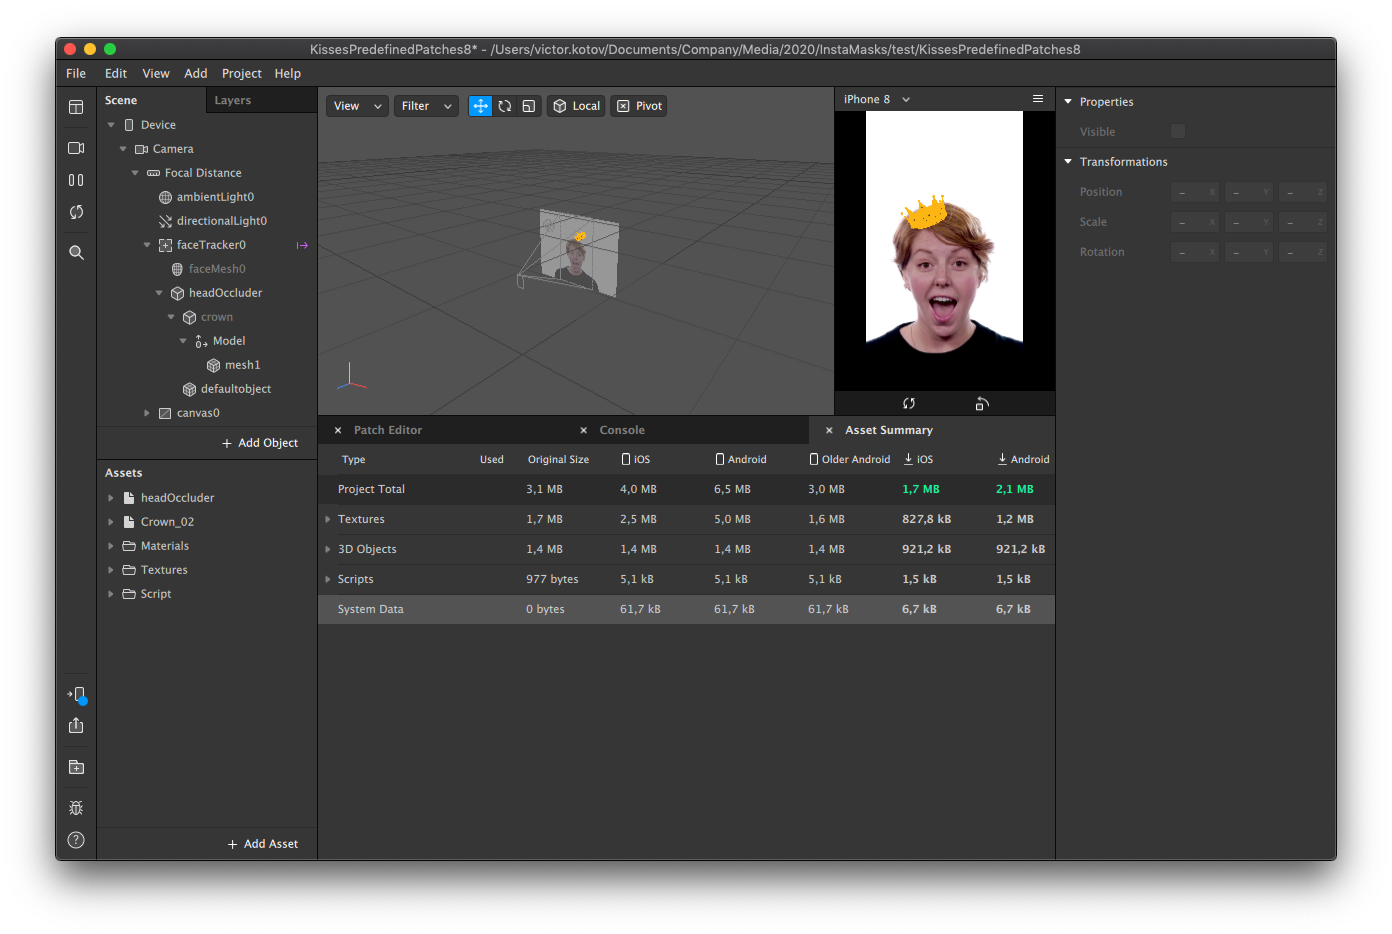
Also, all effects must pass a distribution size check:
This isn’t a big deal because the growing 3D printer market has lowered the entry requirements for special 3D modelling software. Thus, an intricate 3D model can be easily minified with the Autodesk Meshmixer or other similar tools:
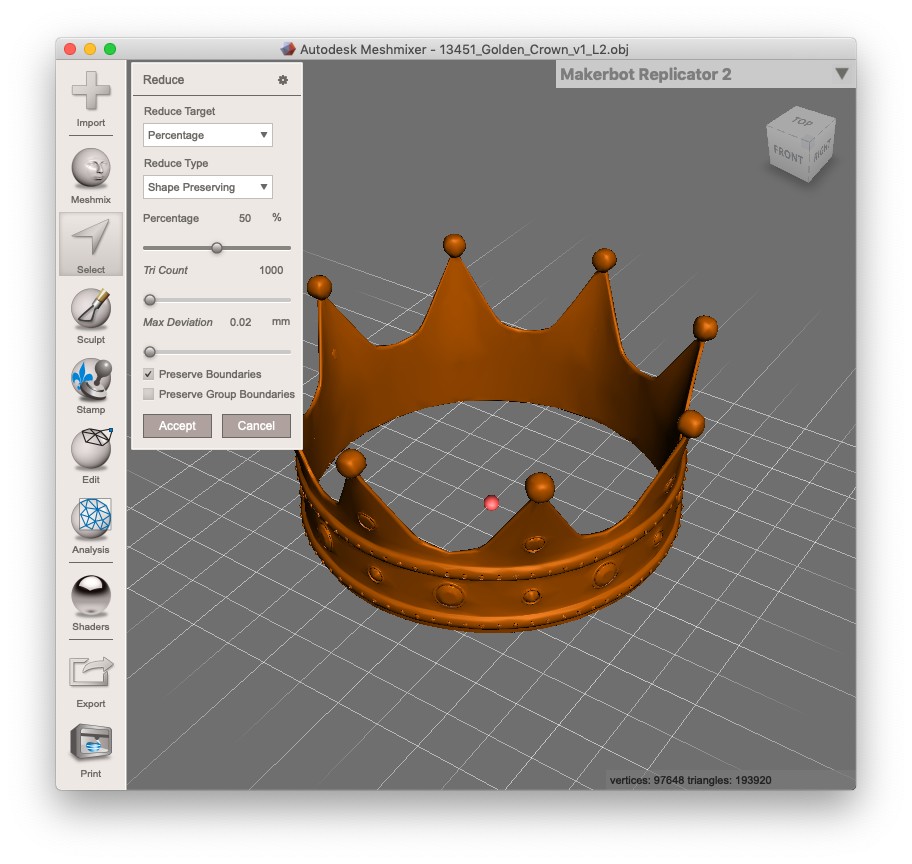
Now, the effect’s distribution perfectly fits within the limits
A few more details from my own experience:
First, the review for an effect requires less time than an update for the same effect (i.e., a few days for the initial review and more than a week for the update with a community support request).
Second, you are able to share your effect with someone via a direct link once the effect is uploaded to the Hub (with a 50-user limitation), so this is a good opportunity for some closed beta testing. However, this only works only for the first upload/version because the test link will lead to the published version, not the update.
It’s also important for a review if the effect promotes a product or brand. The following is a quote from the official guide:
- The content of the effect itself.
- The Instagram account it’s being published from.
The content of the effect
An effect is promotional if it includes a:
- Brand name.
- Logo.
- Product name.
- Product image.
The Instagram account
An effect is also promotional if the Instagram account it’s being published from meets any of these criteria:
- The username or bio states the account is a brand or product.
- The account represents a group of people, like a sports team or band.
- The account is a business account.
More details regarding additional requirements can be found here.
Facebook has some plans to add effects support to Messenger, but for now, this option is only in the beta testing phase.
Two additional points before wrapping up:
- The Spark AR Studio team adds new features quite often, so new versions may be released once or twice a month.
- The Studio doesn’t have backward compatibility for project files, so you’ll be warned and asked about conversion if you open an old project in the latest version of Studio.
Useful Resources
Spark AR Hub (Developers portal)
Effect Icons requirements and templates
3D model editors:
3D model libraries:
PNG image libraries: